
Enhances the morning coffee experience and protects your coffee table in a fashionable way.

That's not the dictionary definition, in case you were wondering. It's my own version.
Have you priced coasters lately? They can be expensive. And ugly. I had been looking for some coaster ideas to make at home and ran across the mug rug idea. It was love at first sight. After all, fabric is so pretty, it's almost an art form itself. And sewing my own mug rug allows me to use cute fabrics that match my decor, or just make me happy. Plus an extra bonus is that 'mug rug' is way more fun to say than 'coaster', right?
If you are an intermediate sewer, you can make some cute mug rugs for yourself.
But be careful, when your friends see them, they are going to want some too.
You will need:
Fabric scraps
Interfacing
thread
sewing machine
rotary cuter
cutting mat and ruler
I used some pretty stiff interfacing because got it for free from my sister. It allows the mug rug to lay nice and flat which I really like. There can't be any wobbly coffee mugs near me. I'm an over-filler.
Here is the one I used:

(you can really make these any size you want, this is just what I did)


Next, you will want to go to your fabric stash. Or maybe you'll pick your fabrics first and then cut your interfacing. Whatever works for you. I like to let everyone be an individual.

I picked out a few scraps I liked. I decided to just piece strips together to make the top.

I use one solid piece for the back. If you feel ambitious, you could piece the back too. (I wouldn't do that myself unless I was feeling a little overly ambitious. That rarely happens.)

Sorry, no measurements for you here because there is no real pattern. Obviously you want your finished size to be the same size as your interfacing which is 6 x 7. I pieced my fabric together randomly and made sure it was at least too big so I could trim it down.

When you are done, you will iron your face and back onto your fusible fleece. I like this because it keeps everything from shifting during the binding process.

Trim off any excess fabric.

And, voile! You have an interfacing sandwich.

Next, we are going to make our binding.
This is the most complicated part of this project. But a binding really finishes off a project and adds just the right amount of pizzazz.
That's right, I said pizzazz.

You need to cut 2 1/4" strips. Enough to go all the way around your project.

Here's how you join two strips together: lay them down right sides together at the ends, it helps to over lap a little like in the upper picture.

Then you will sew a diagonal line from the top corner of the bottom fabric to the lower corner of the top fabric. I always have to make sure of which way I am supposed to sew BEFORE I begin sewing. I've done it wrong too many times.

When you are done you will have a little flag. Trim that off about 1/4" from your seam.

Press the seam open. Now your strips are joined together!

Cut one end at an angle, fold over 1/4" and press

Now take that long strip of fabric and fold it all in half, pressing as you go.

Your are going to lay the pointy end of your binding strip on the top of your mug rug about an inch down on one side. Put the raw edge of the binding strip fabric on the outside of your mug rug project. Give your self about 2 inches from the top of your binding strip before you start sewing. Sew a quarter inch in from the raw edge of your binding strip. Stop sewing a 1/4" from the end of the side you are sewing.

Fold that binding fabric up off of the mug rug.

Then fold it back over the top of that fold you just made. (This is where I hope the pictures are explaining this process better than my words.)

Continue sewing in this manner all the way around your mug rug until you get to the beginning.

The end of your binding strip is going to tuck inside of the beginning of your binding strip.

See, just like that. Then you sew it down.

Ta! Da! That was a big accomplishment.

After taking a moment to admire your hard work and mostly straight stitching, it's time to move on the the next step.

Peel that binding back and press it open.

It will look a little like a hot dog basket. But I would't go putting any hot dogs in it.

Now you have to fold the binding around to the back side and pin, pin, pin. Miter those corners so they look nice.
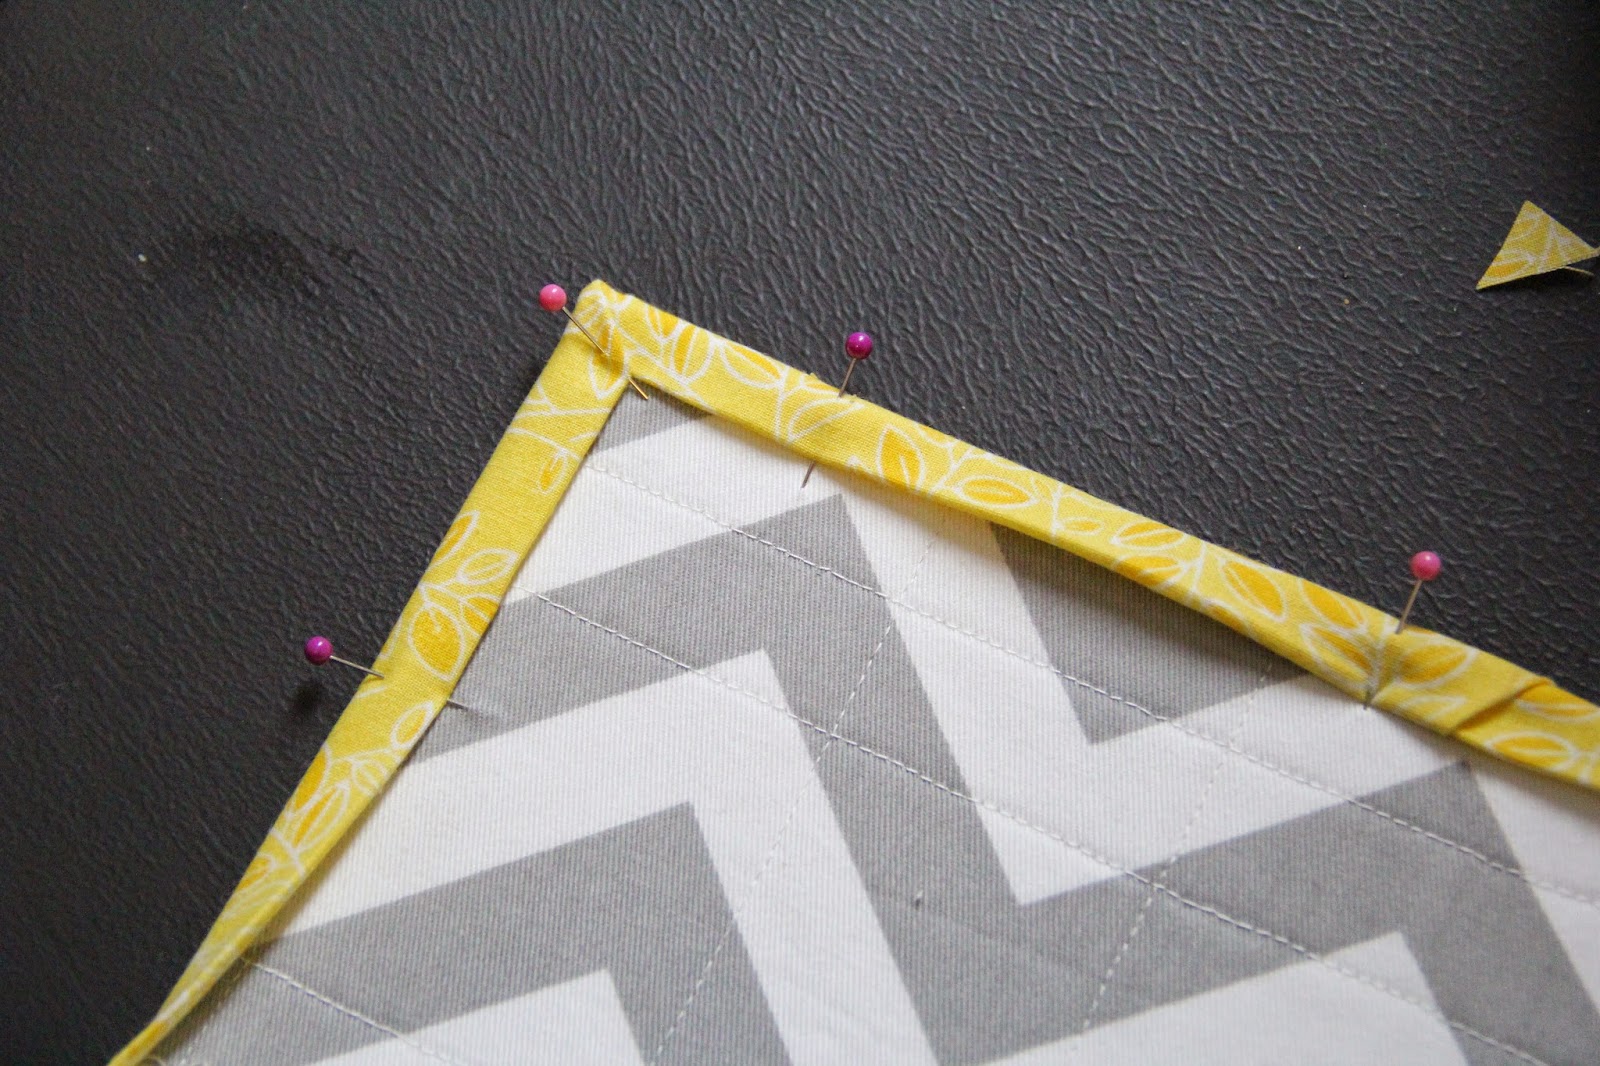
I admit, I hate pinning. But there really is no other way to get this done right.

Now flip that bad boy over to the top and you are going to stitch in the ditch all the way around.


At this point I pray that my measurements weren't off and that I pinned well enough. It's important that you catch the binding on the back side all the way around. This isn't as neat of a way to finish off a binding as hand stitching it. But who has time for that? Not this girl.

You did it! Stand back in amazement at what a beautiful thing you have just created. Mug rugs are fun and pretty. They are also more effective at soaking up drips than most coasters I have seen.

Your morning mug will thank you for making this.
