Saturday, December 21, 2013

Home Made Vanilla Extract

I finally turned my hand at home made vanilla extract.  
I don't like to buy the 'Imitation Vanilla Flavoring' but I get grumpy at the expensive prices for the good stuff.  
I used to have a nice big bottle of Mexican vanilla. However, I ran out of it about 1 year after my last trip to Mexico.  Which also happens to be my only trip to Mexico. Which happens to have taken place, oh, 11 years ago.


After a little online research, I discovered that making your own vanilla is one of the easiest things in the world.

Here is the ingredients list:
Vodka (the cheap stuff is fine)
Vanilla beans
Jar with a seal-able lid


I was able to buy my beans at our local natural food grocery store.  They were not very expensive. About $1.50 a piece. 
I got Madagascar vanilla beans.  
Mmmmm, smells so good! 

Basically, the recipe for vanilla is a 1 to 1 ratio
1 vanilla bean for every 1 cup of vodka 

It is really important to remember to take your vanilla bean and cut it down the middle 1/4 inch from the top until 1/4 inch from the bottom.  You want the inner parts of the bean to be able to get out into the vodka and steep.


Be certain to cover your bean with vodka.  You can always fold it in half if you need to. Then you need to put your special brew away in a dark place for about 2 months.  I put mine in the pantry. Every few days, give it a good shake to mix up all that beaniness.  It will take on a beautiful caramel color as it gets closer to being done.  The longer you let it sit, the stronger it will be. 
I made mine in a big batch and split it up into these smaller bottles to give away as gifts.
Here is the really cool thing about home made vanilla.  As you use it up, you can just continue to replace the vodka in the bottle.  You have a never ending supply of vanilla! 
The only drawback to this idea?
You have to plan ahead if you want to make it as a gift to give away during the holidays.
So put this idea in your back pocket for next year.  
It is a gift worth giving.


Pin It

Thursday, December 19, 2013

Did Someone Say Cookie?

The Advent made me do it.
Honestly it wasn't my idea to have 10 kids decorate Christmas cookies. 
With sprinkles.
That's right, sprinkles.
But, the Advent calendar said to invite friends over for a Christmas tea.  Well, since kids don't typically drink tea (I blame it on us not being English), I thought we probably needed to have an activity. 
What can you do with kids that is fun and festive?
Well, decorate cookies of course!


So the day before all the friends were to come over I whipped up a couple batches of cutout cookies.  We like ginger bread and sugar in this house. I went on Pinterest to find some new recipe's. I am always looking for that perfect one that will become the traditional holiday recipe. 
You can find the recipe for the sugar cookies here.  I really like this recipe.  The dough was really easy to work with, rolled out well, baked well, and tasted good! I added a tsp of almond extract to the dough for a little added flavor.  I would definitely use this recipe again.
The ginger bread recipe can be found here.  Hunky Hubby is the Ginger bread connoisseur around this house.  He gives this recipe a thumbs up.  It also was very easy to work with and roll out. 
But this story isn't really about the cookies.  It's about the decorating! 
Frosting is always a challenge.  I really like to pipe the frosting on the cookies.  It gives you more control and enables more elaborate designs.  So, I thought we'd pipe the frosting.  
However, I forgot to give the kids a class on how to hold the frosting bags.  After all, when I asked them if they knew what they were doing they all said that they knew how to pipe frosting! Well, we ended up with a few messes like this:


In case you were wondering, the frosting is not supposed to be oozing out the top like that.  One of the bags actually popped and oozed 'cookie monster' blue frosting all over the plate Wyat was decorating his cookies on.  Thanks to the Mommas that were here, we got the messes cleaned up and decided to ditch the piping method and just let the kids have at it with butter knives.


There was much merry making and I even heard a kid or two say "I'm never going to forget this!" Does it matter if they said it after the frosting explosion? 
Cookies were frosted, sprinkled, and eaten.  I even offered them tea! They had hot cocoa instead.


These girls were cookie decorating diva's.  They decorated at least 2 dozen cookies apiece.  I gotta get me a couple girls! 
My sons only decorated enough cookies to eat before they went outside to play. 


And the results of all that frosting and sprinkling? 
Beautiful, creative, cookie masterpieces.


Now now, I don't want to discount the boys in this group.  They did a fine job too. 
One of them came back inside and started decorating again, sprinkling away to his hearts content.  In fact it's hard to find the cookie underneath all those sprinkles! 


It really was a fun time.  
The kids had fun, which was my goal, and the moms had fun, even with the messes. 


My only regret is that we couldn't have all our friends over to decorate cookies.  
But come on people, I am not a saint!
Didn't you hear me say sprinkles! 
(did you know dogs don't lick sprinkles up off the floor? How annoying!)


We were able to send plenty of cookies home with our friends.  And we still have plenty of cookies left to eat! I have a couple of volunteers to help with that. 


We just might have to make this a holiday tradition.  As long as I mentally prepared for the chaos and mess before hand, I was able to handle everything that came our way.  Although, I wouldn't have wanted to do it without the help of my fellow moms. 

Maybe you would like to host a cookie decorating party of your own?  It doesn't take much, just some cookies, frosting, and friends. 
Merry Christmas!!


Pin It

Wednesday, December 18, 2013

A Quick and Easy Holiday Garland

I was having some people over and I wanted to add one more little touch to my Christmas decorations before they arrived.
I am very enamored with garlands lately.
They are fun, they are festive, and they are cute! 
So I grabbed some items from my craft closet and kitchen and made a cute little garland for my kitchen window.


You'll need:
twine or bakers twine
cup cake liners
paper snowflakes
and a stapler

I cut out the paper snowflakes on the Cricut.
The cupcake liners I picked up at Wal-mart.
I think I got the twine at the Target dollar spot.

Take your twine and pre-measure the area where you want to hang your garland.

Then, you will take your cupcake liners and fold them in half.


You will simply use your stapler to fix the cupcake liners and snowflakes to the twine.  You may need more than one staple.


You will be amazed at how fast this little garland goes together.

When you are all done, hang it up and enjoy!


An easy-peasy craft that anyone can do.  
It adds just the right touch of holiday cheer! 

Pin It

Tuesday, December 17, 2013

Spreading Christmas Cheer For All to Hear ,er... kind of

My Mom, came up to visit recently with my sister and her kids. We had a fun time crafting and hanging out.  Although it always feels like we spend most of our time preparing meals and cleaning up after eating the meals. 
While they were here, I took advantage of the opportunity to get a fun picture of the cousins.


With Ella being the only girl in this crazy bunch of kids, I couldn't resist posing them this way.  
I think Ella really liked it too! 
That's not a fake smile.

I got the basic idea for the photo off of Pinterest, but the photo I saw was a romantic pose of a couple tied up in the lights. Well, we just tweaked that idea a bit and we came up with some fun alternatives for the kids.


For the most part, the boys actually enjoyed taking these pictures.  It helped that they were allowed to be goofy and didn't have to look at the camera.


Some of them got into it more than others.


Of course when I wanted to take the shot of them all looking at the camera and smiling, things got a little hairy.  What is so hard about looking at the camera and smiling with a normal smile?  You would think I was torturing them.  The problem is, it becomes torture because they take FOREVER to cooperate and look pleasant instead of like deranged children. 


Wyat's smile is totally fake in the above photo. 


The boys got to get their sister back with this shot.  I wonder why only one of them looks happy about it?  
Overall, as photo shoots with children that are related to you and especially the ones that came from your womb go, this was pretty painless with some really fun results.  I did have a few snowflakes ruin a shot or two because they happened to land right in someones eye in the photo, but other than that, it was good.  The snow outside kept things nice and bright so I didn't have to use a flash. I was able to keep my iso low and the shutter speed fast enough that the kids didn't turn out blurry. 
Seeing as how it is IMPOSSIBLE for one child who shall not be named to sit still for 5 seconds. Ever. 
So this is our version of Christmas cheer.  
I hope you enjoy it.  
It makes me laugh!
Oh, if you have any tips for getting your kids to cooperate when getting their picture taken, I'm willing to hear them.  
Comment below. Please.  I need the help.


Pin It

Sunday, December 15, 2013

The Story Tree

I love Christmas. 
Not only is it the celebration of my Saviors' birth, but it is merry and festive. 

The lights, the food, the merriness in hearts, the colors, the smells, 
did I say the food? Mmmmm, it all goes together to create a wonderful atmosphere of anticipation and celebration! 
One of the things I enjoy doing in preparation for the holidays is decorating. 
Decorating the house for the Holiday has it's own set of traditions. One of our traditions centers around the Christmas tree. We typically go out into the woods to hunt for the perfect tree the weekend after Thanksgiving.  We drag it back home and set it up inside where we sip on mulled, hand pressed apple cider while listening to Frank Sinatra croon traditional Christmas Carols.  
It's good times people, good times. 
I have had many ideas about how the tree should be decorated over the years.  I mean with all my Pinteresting and the pictures that pop up in magazines, there is plenty of inspiration for a perfectly trimmed Tanenbaum. You've seen those perfectly decorated trees where the ornaments all color coordinate and the ribbon swirls around the tree just right.  Where it is so covered in ornaments and lights you can barely tell there is an evergreen tree underneath it all.  They are usually placed in the perfect corner of a spotless living room decorated with white furnishings. You just know that if that tree was real, it wouldn't dare drop a needle on the impeccable rug it has been placed on.  They are gorgeous!

Exhibit A:
photo courtesy of thelilypadcottage.com
All I have to say about those drool worthy residences is - they obviously don't have kids.  
Or a budget.
Of which, I have both.  Which is okay, because as pretty as those homes are, they would never survive our lifestyle and they wouldn't carry the meaning that our humble evergreen carries throughout the season for us. 
Besides that, where do they store all those decorations?  I have a lot of storage space but it is already pretty full. Or do they sell it all and start new the next year? Maybe they are the type who couldn't dream of decorating their tree the same way two years in a row?Hmmm, something to ponder.

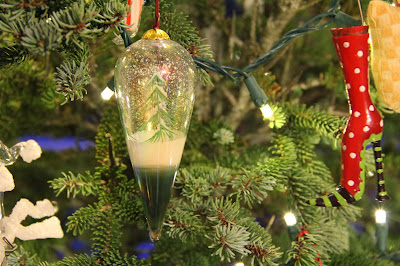
Every year I buy a new Christmas ornament for each of my boys and one to keep for us.  Ideally these ornaments are chosen because they spark a memory of something significant that took place in each boys life that past year.  Sometimes, they aren't as meaningful but happen to be something the boys picked out themselves, which means it is something their 5, 7 or 9 year old self liked that year. 
Let me show you some examples:

 A couple years ago, around the time when the movie The Legend of GaHoole came out, the boys were really into owls.  So, I made them each a little owl ornament.


This little guy happens to be from a set that Hunky Hubby got for me one of our first Christmas's together. I believe we were living in Neenah, WI at the time.


This motorcycle rider was given to Seth.  He loved watching his daddy race dirt bikes. It reminds me of all the fun we had together attending the races, often with Uncle Ryan or Uncle Dan.


 This beauty was a gift from Ms. June.  She was Annie's original owner and she gave this to us as a thank you for watching Annie over the holidays one year. 


My mom gave this ornament to me when I was in college.  Little did she know I would still enjoy photography years later.


I found this one for Hunky Hubby this year.  It is perfect because the theme for the summer camp at SBR this year was Ship Wrecked.  He built a huge ship in the field to go along with the theme.  It was awesome, the best prop yet.


This pretty ornament was a gift from my mom when I believed that our family was complete with two boys. I am so glad I was wrong.  It reminds me of how small my vision for my life and future is compared to God's plan for me.


When Wyat was a baby, we called him our 'Little Moose'.  He was such a big boy.  I found this ornament for him to remember that time which is good since that nickname didn't stick. 


Tate was obsessed with dinosaurs for a couple of years. At 4 he could pronounce all their names and knew most of the facts about them.  He would correct his grandparents if they made mistakes while reading him Dino books. 


The first year that all the boys played soccer they each received this soccer ball ornament. 


These are just a few examples.   
Our tree, while it may not be perfectly decorated or color coordinated, tells a story. 
Our story. 
The memories that the ornaments represent are precious.


The stories get told over and over each year, cementing them in our sons minds, creating tradition and a sense of  reverence. 
It is the stories that bind us together as a family. 

And because of that, our tree is the most beautiful of all.  


Pin It