Friday, February 15, 2013

Red Velvet Cupcakes

Valentine's Day wouldn't be complete without a delicious dessert.  
In memory of my beloved Grandmother who made me a Red Velvet cake for all of my Birthdays, except the year I made her tint it blue instead, we made Red Velvet.
Also, because Red Velvet goes along with the red and white Valentine's color scheme.
I did not use Grandma's recipe, instead I turned to Pinterest to find something a little bit easier.
Pinterest never disappoints.


I picked these zebra striped Wilton baking cups at our 
local Wal-Mart.
I thought they added just the right amount of wildness to our cupcakes. 


Then we got to the task of mixing up our batter.  The best part of Red Velvet is it's beautiful red color. 
 My friend Mikayla lent me a hand with the baking.  Actually she lent me two, buts that's not how the phrase goes.


Wyat is always around to help with the baking as well.  
You can see what part he likes to 'help' with the most.


Oooh, there's our pretty batter!  
Looks like a bowl of blood.
Well it does! 
Come on, give me a break, I live with boys!


Our cupcakes took exactly 18 minutes to bake.  I over filled most of the cups, I guess they really only need to be half full. Fortunately they still turned out okay.


Aren't they pretty? We topped them off with some really yummy cream cheese frosting.  I used a zip-loc bag and just cut off the corner.  That worked so much better than trying to spread it on. Plus it looks prettier too. 


These cupcakes get a 5 star rating in my book. 
I'd share the link with you.  But I can't find it! Good thing I wrote down the recipe.  I'll keep looking for it and when I find it, I'll come back and post the link. 
Otherwise just search around pinterest yourself! You'll find lots of delicious options to choose from.


Pin It

Thursday, February 14, 2013

Happy Valentine's Day!

Happy Valentine's Day everyone! 
 We like to celebrate this holiday in our house.  Well, I like to celebrate it. But it isn't hard to get the boys involved. 
So this week I made plans for us to have  a little Valentine celebration.


For just a few dollars you can pick up a few decorations to make a festive and fun table for the family.
The boys also got involved in the decorating by cutting out hearts, and making me some Valentin'e day cards.  


A little crepe paper, some home made heart garland, and it looks like a veritable Valentine extravaganza! 
Don't you just love it?  
I do.  
Especially the home made cards. 
They are so precious.
Let me quote one for you: "P.s. I really, really, really love you.  Thank you for being my teacher, cook, mom, caretaker, adviser  instructor, and thank you for loving me."
Doesn't that make your heart just melt?  
I couldn't share the main message of the card, but trust me, that boy was being real and letting out his raw, true feelings in a sweet and loving way.  
I can just imagine the love letters he'll write to his wife one day.  He's starting out good! 


My personal favorite decoration I picked up at Wal-mart:
Mustache straws!!!


Isn't it crazy that one day my little boy might be able to grow one of these bushy, fuzzy things on his very own lip?  I hope not. I like the fake ones a lot, but the real ones.  Well, let's just say, it takes a special man to pull it off.  And he's usually wearing cowboy boots and dirty dungarees.


My middle son made me a flower vase. I'm sure when it's all done it will be painted up in a glorious fashion! I kinda got it in it's raw undone form.  But it's the thought that counts! 


A jar full of candy makes a festive table centerpiece.  Plus the boys were excited about all they would get to eat.  They are currently rattling the walls upstairs.  They are supposed to be working quietly.


We made Red Velvet Pancakes for breakfast this morning.  To get them in a heart shape, because that's the only shape that would have been acceptable this morning, I used a ziploc bag and a frosting tip.


You may accidentally have pancake batter pooling on your counter top if you are a messy cook like me.  But it all washes up.


Aren't they pretty?


Here's the recipe.  I got it off of Pinterest.  But I don't think it is pinned and now it's lost in cyber space somewhere.  You could probably Google it.


So, I mustache you a question . . . 
How does your family celebrate Valentine's Day?


Pin It

Saturday, February 9, 2013

Lego Bombs

Lego Bomb: a small piece of plastic that is sharpened to a point, usually by small blunt teeth, left inconspicuously on the floor in a common walk way, waiting for an adult to step on it.  
Results in immediate loss of limb use, excruciating pain, and causes voices to reach octaves not hit since puberty. 

I'm sure I'm not the only person that has suspected but never had proof, that our kids leave Lego bombs on the floor with the express intention of causing their loving parents pain.
I now have proof.

Exhibit A:
3 Lego men with their pointy little hands sticking up in the air, placed strategically in front of the basement stairs, waiting patiently for their first unsuspecting victim.


Exhibit B: 
My hidden camera caught an unidentified child filing those plastic hands into super pointy spears of death.


The child who shall not be named will pay for this dastardly deed.  But now I have it:  
Proof that Lego's really are left on the floor for the express purpose of crippling poor unsuspecting parents.  
Who invented these things anyway? 


Fortunately, I was able to avoid a most certain intense and crippling pain in my foot because I saw these guys laying here.  
The children's plan was foiled. 
This time.
But it has happened to me before.  It has happened to all of us before. The worst happens to be when the Lego blends in with the carpet.  You have no chance against that horrible pointy piece of plastic that somehow manages to find the most sensitive spot on the bottom of your foot. Then what happens when you step on it is that instead of taking a full step like you had planned, the sudden searing pain combined with your body's inertia, forces you to crumble to the ground in a floppy garbled mess, shrieking like a banshee or a stuck pig. 
Meanwhile your children try very hard to suppress their grins and laughter at the greatest victory they can achieve when it comes to inflicting pain on their parents.  

I'd consider fighting back, Lego with Lego, but for some reason children seem to be immune to the horrendous, biting, fierce, sharp, intense, horrible, crippling pain that is caused by stepping on a Lego.
I bet they were invented by a kid. 
And to think, I have actually paid money to bring those things into my home. 
No worries, I've got my own ammunition.
I guess they'll be having liver and onions with a sauerkraut and a squash side dish for dinner next time we get a babysitter. 

Hee, hee, hee.


Pin It

Wednesday, January 30, 2013

Even Ninja's Need a Nap Sometimes

My two youngest warriors have been pretending to be Ninja's lately.  They dress-up in the hand-me-down karate uniforms they have. They have also been checking out every LEGO Ninjago book that the library has. (By dress-up I mean wear for 3 consecutive days in a row and to bed, until I pry it off their body to wash where they promptly retrieve it from the dryer and put it on again).
There has been a lot of wrestling, leaping, and kicking around here.

However, the other day one of my little Ninja's was extremely grumpy.
Let me just tell you, grumpy Ninja's are no fun.
 

I was running out of patience with my little guy, so I did what most sane mothers will do in an effort to keep their sanity, and keep their child alive to see his next birthday.
So, I sent him to bed. 
Come on, sometimes a mom's got to do what a mom's got to do.
After a bit, I noticed it was pretty quiet in the direction of his bedroom, so I went to go check on him. 
I found him all snuggled up with his blankie and animals, fast asleep. Let's face it Momma's, when you see your fearsome Ninja all snuggled up with his special buddies, it melts all your previous frustrations away.  
It's called the power of the power of the warm fuzzy.
I also realized, I haven't seen my little boy sleeping in the daylight in a long time.  Nap time is a thing of the past here in this house. 

-Pause for a moment of silence-

Yeah, anyway when my little Ninja woke up, his mood was considerably improved.  
He of course claimed that he hadn't really fallen asleep. 

Whatever


The truth is, we could all benefit from a little nap (i.e. alone time), once in awhile.  However, like my son, we can't always make that call on our own.  Sometimes it's because we can't see our attitude the same way others can see it.  Sometimes it's because we think we're gonna miss something important.  And sometimes it's because we think we would be neglecting our responsibilities.  However, by removing ourselves from our normal routine for a short time, we can come back renewed, refreshed, and with a better attitude. 

Now that's something this Ninja Momma can benefit from.   

I realized recently that I was behaving a lot like my boy.  Grumpy, a bad listener, quick to lose my temper, and just generally not happy.
The fact is, I needed to be put on a time-out.
  So this week, we've been taking a break from our normal routine because Momma needs an attitude adjustment. Through my quiet time with the Lord each morning, I realized, I was setting the poor tone that was pervading my home.  Part of the reason my boys were frustrating me so much, is because I was so easily frustrated. 
So, I've been praying about my attitude, evaluating whether I really do need a night off, and trying to do a better job of  doing what's right when it comes to taking care of my family. 
Guess what?  Today, my little Ninja's played together better than they have in a long time.  Seems like when Momma has her attitude in check, everyone else is happier too. 
I'm glad that God showed me the truth about my attitude.  I'm glad that He is willing to help me change it.  I'm also glad that he loves my babies even more than I do and no matter what, He will help me be the exact Momma they need.
As long as I'm willing to take a time-out every once in awhile and listen to Him.

Pin It

Sunday, January 27, 2013

Home Made Laundry Soap on a Budget

Everyone likes to save a buck right? 
 Especially on things that aren't exactly 'fun' to buy.
Things like toilet paper and laundry soap definitely don't qualify as 'fun' purchases in my book.  
I haven't learned how to make my own toilet paper yet, but I have learned a really cost effective way to make laundry soap.


A good friend shared this recipe with me a couple of years ago. 
 I have made it in the powder and the liquid version.  Although I liked the powdered version, I've gotten a new washing machine since the last time I made it. (It's been a long time since I've made laundry detergent)  
I wanted to use a liquid this time and I wanted it thin enough to work well in my machine.  Like most new machines, mine is HE labeled.  This soap meets the HE standards. 
I already had all the ingredients in the laundry room.  Apparently they have a long shelf life. I was also running low on the store bought detergent I'd been using.  This offered me the perfect opportunity to make some more detergent.  It isn't hard, but it does take a little time, and some waiting.  The only unusual item you may not have on hand is a large bucket.  Oh, and enough storage containers to hold all your amazing soap!  You will have to plan ahead so you have enough of those.  You can use any recycled containers that you have on hand.
I know there are other tutorials out on the internet for this, but I thought I'd go ahead and share my method with you. This is very cost efficient.  It is also gentle on your skin. It should be safe enough for babies, but try it sparingly first. Plus, it cleans well.
You only need 4 ingredients if you count water.    
They are Borax, Super Washing Soda, and Fels-Naptha bar soap. You should be able to get all these ingredients all totaled for around $6.00 at your local grocery or Wal-mart stores.  Plus, there will be enough Borax and Super Washing Soda to make many more batches of detergent.


This is what Fels-Naptha looks like.  
I love the smell of this stuff. 


I also love the look of the bar once you unwrap it.


Okay, your first step is to grate the bar of soap.  Now you can do it by hand like I did, or you can take your food processor and use that.  Whichever you prefer.


Then you take 4 cups of warm tap water and the grated soap and put them in a pan on the stove.


Make sure you keep stirring it as it cooks on medium heat on the stove.  Your goal is to melt the soap, you're not trying to boil it.
                                   Look! Almost done!

Once the soap flakes are all melted, you will pour the mixture into your five gallon bucket.


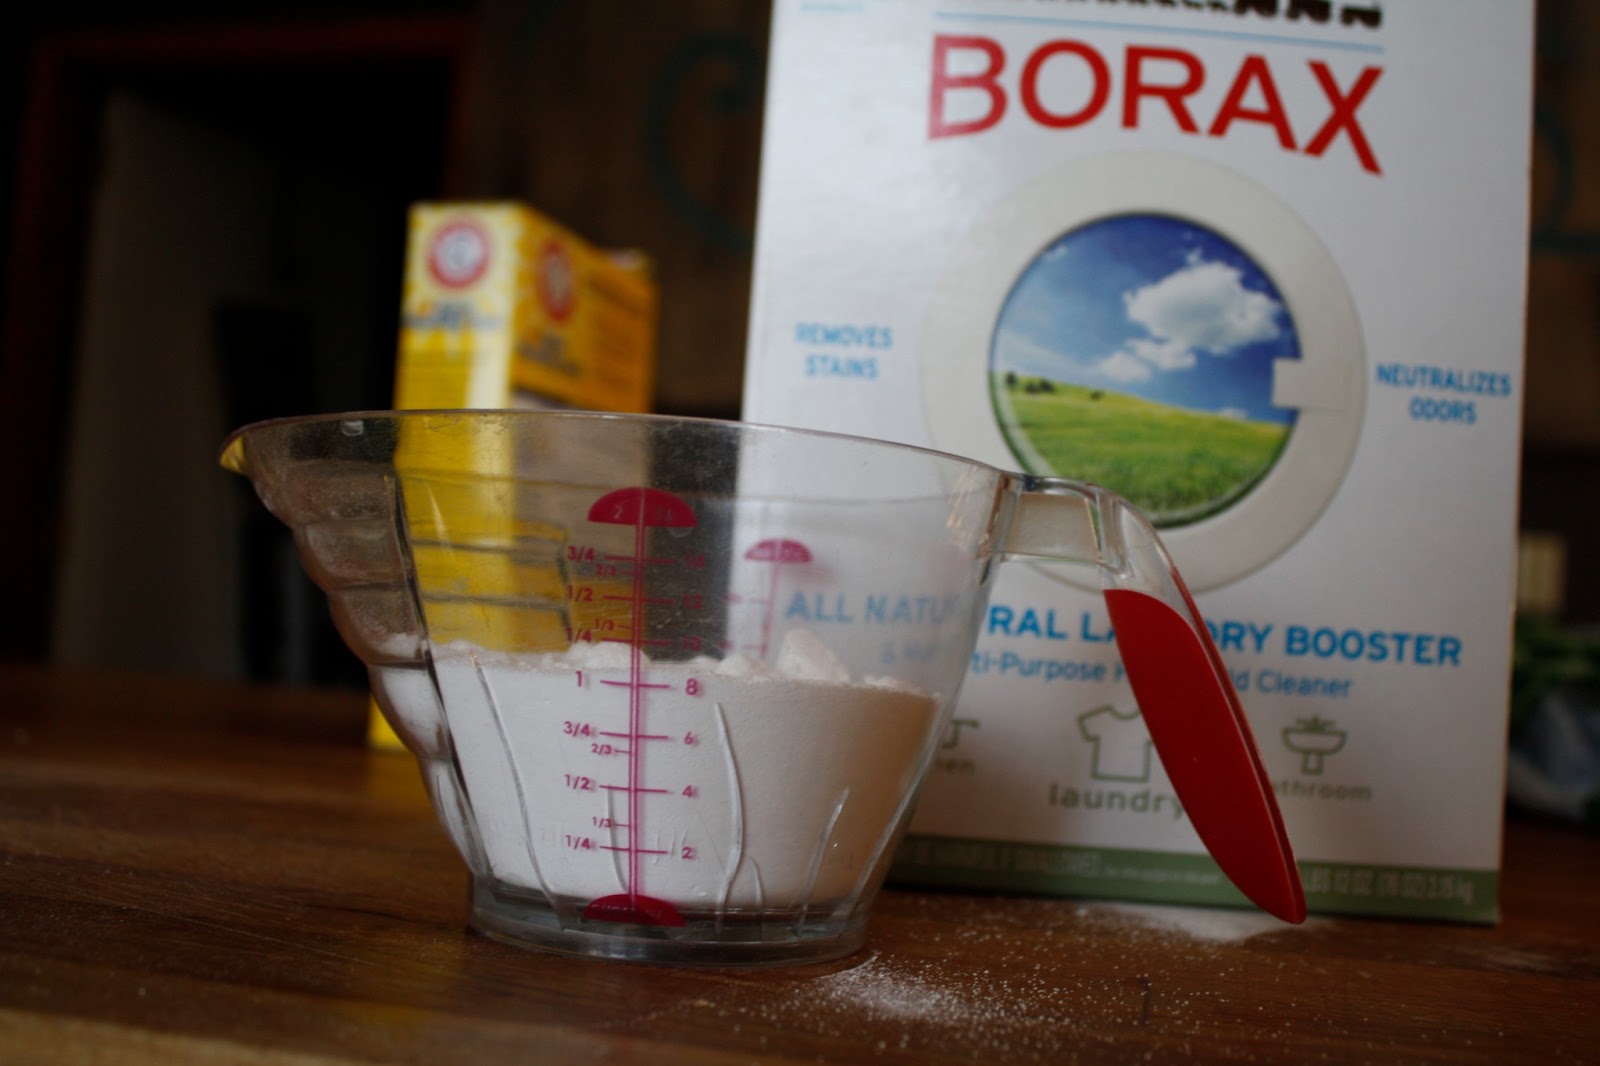
Now measure out 1 cup of Borax,


and 1 cup of Super Washing Soda.
I put mine in the same measuring cup at the same time.


                              Add them to the soap in the bucket.


Now, fill your bucket half full with more warm tap water.  You want it to be warm so that it dissolves the powders you just added.  Stir it up until you think that everything has turned into a liquid.


I suggest moving your bucket to where you are going to let it sit, before you fill it the rest of the way with warm water. A five gallon bucket full of liquid is pretty heavy and awkward to move.  You do not want to spill this bucket all over your floor in a moving disaster. Although, it would probably clean your floor nicely.


Find a lid to cover your bucket with.  Even a towel will work.  You just want to keep it from getting any schmutz in it as it sits.  
Now comes the hard part.  You need to let your bucket sit overnight and up to 24 hours.


When you take your lid off the next day. you will be able to see that things have changed.  It will really become apparent to you when you when you go to stir it.  It has changed from a thin liquid to a gelatinous glob. 
Don't you just love the word gelatinous?
I do.


You are now going to stir your gelatinous goo.  I used a long handled spoon.  It was not long enough. 
I still had to dig my hand into my soap. 


My spoon stirring did not break up the goo completely, so I got out my handy-dandy mixer to help me out.  I mixed with one hand and stirred with the other and eventually I broke up all that goo into a slightly curdled looking liquid.


Now is when you need all of those storage containers that you have collected.  I happened to have quite a few large mason jars.  These are about a 2 quart size. 


I filled 9 of them completely full with my soap mixture. Then I filled a one gallon glass jar half full with my soap and filled it the rest of the way with warm water.  This is the jar that I will be using first.  I even had enough soap to fill another 2 quart jar half full, top off with water, and give to a friend. 


I saw some cute labels on Pinterest for laundry soap, but I decided to make my own.  I'm a little obsessed with things having mustaches on them lately.  So I had to add a mustache to my labels.  Don't ask me what it has to do with laundry.  Except the fact that I wash a lot of clothes for little future mustache wearing men.


Then, because I didn't want to make labels again the next time I made soap, I got out my handy-dandy laminator.  I was really wishing for a punch the size of this circle I printed up.  
My perfectionist side was not happy with having to cut out these circles by hand. 
Did you know that it is impossible to cut out a perfectly even and smooth sided circle by hand.  
Well it is impossible for me.


I LOVE laminating things.  I remember helping my teacher with the huge laminators in grade school once.  It was love at first melt.


Before I put the lid on the jar of soap I would be using right away, I added a blend of essential oil drops to help it smell even yummier.  Remember though, essential oil smells will leach out when exposed to sunlight.  I plan to keep my soap hidden in a dark cupboard, so it's okay that I put it in a clear glass jar.


I added my label, and ta-da! A wonderful, inexpesive, yet hardworking jar of soap!


I sized the labels so they would fit under the ring of a wide mouth jar lid.  I figured I could put them either on top or taped to the side of the jar. 
I am not technologically gifted enough to figure out how to share these labels with you as a free printable, otherwise I would.
(Maybe one day I'll have one of my techie friends help me out with that.)


Here is all my soap - minus the gallon jar.  All these bottles are only half of what they will be.  When I take one off the shelf to use it, I will pour it in my gallon jar and double it with water.  
I can't even begin to calculate how many loads I've got sitting here! Or how cheap each load is!
But trust me, it's cheap! 


I will also wait to add essential oils until I open each one and use it. 


I guess the only problem with this soap recipe is having the space to store it all!  I think it's a fair trade for all the money I'm saving.


I put 1/2 cup for each load on my label, however there is no exact science to this.  Play with the measurement and see what works best in your machine.  I have a large capacity washer and I like to pack it FULL.  I read on a few other blogs that you can use as little as 1/4 cup in a front loading washing machine and up to 5/8 cup in a top loader.


I hope this inspires soap making in many of your households.  
Save your money for something fun.  


 Recipe Recap:
1 bar Fels-Naptha soap
1 cup Super Washing Soda
1 Cup Borax
4 cups water
a 5 gallon bucket
many storage containers


Pin It